Lash Lift Kit Reviews: My Top Picks for DIY At-Home Lash Lift and Lamination
Hey beauties! I’m thrilled to take you through my latest lash journey, testing out some of the best at-home lash lift and lamination kits available. These DIY lash-styling kits bring professional results to the comfort of your home, helping you save both time and money while achieving that fluttery lash effect we all love.
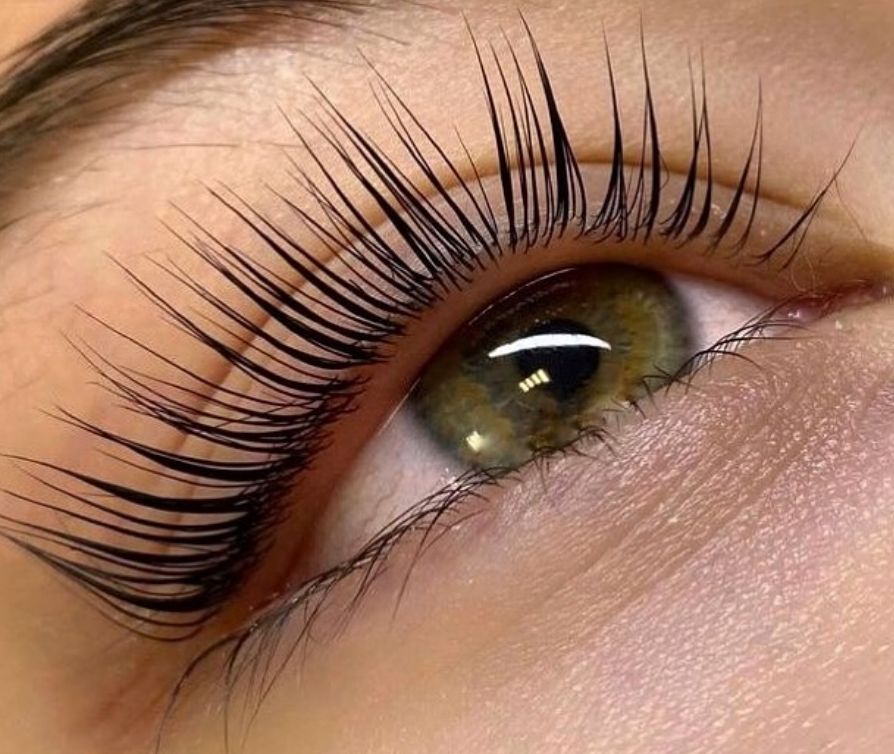
An at-home lash lift is not only convenient but allows you to wake up each day with perfectly curled, lifted lashes without mascara, lash extensions, or an eyelash curler. I’ve tried each of these products and am excited to share my thoughts on each one. Whether you’re new to the lash lift and lamination or already a fan, let’s explore which kit might be your perfect match!
Why At-Home Lash Lift and Lamination Are a Great Option
Doing your lash lift and lamination at home offers a range of advantages. Not only does it save you money on beauty salon appointments, but most kits provide multiple uses, so you’ll save big over time. The convenience is also a major plus: with an at-home kit, you can lift your lashes on your own schedule, without the hassle of making or keeping appointments.
The natural enhancement is another major benefit; lash lift and lamination give a subtle yet beautiful curl and length to your lashes without the need for lash extensions. When done with a quality kit, the results can last between 4 and 8 weeks, making it a low-maintenance beauty option. Many kits also come with nourishing ingredients that keep your lashes soft, healthy, and strong, even with regular use
Ready to find your ideal kit? Here’s a deep dive into my top five picks, each offering something special.
1. Nanolash Lash Lift Kit
The Nanolash Lash Lift Kit is my absolute favorite when it comes to combining professional-grade results with ease of use. This complete kit includes everything needed for up to 10 lash lift and lamination treatments, providing an amazing, long-lasting effect that lasts beautifully for up to 8 weeks. It’s one of the most complete kits available, making it perfect for both beginners and pros.
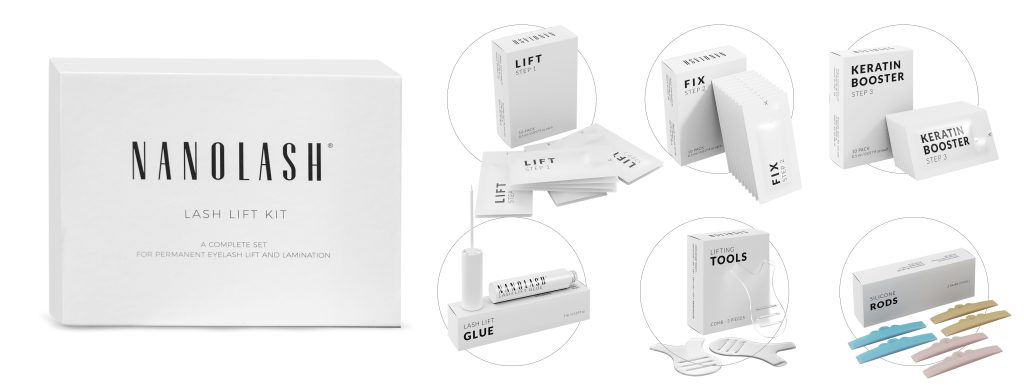
What makes Nanolash especially standout is its nourishing formula, rich with hydrolyzed keratin, lanolin, and a mix of oils like olive, avocado, and coconut. This ingredient lineup works wonders for conditioning the lashes, making them soft, healthy, and resilient. Even if you have sensitive eyes, this kit is gentle yet effective, giving your lashes a natural lift without the stiff and dry feeling. For a cost-effective, nourishing, and long-lasting option, Nanolash remains my top choice.
When I used the Nanolash kit, my lashes looked lifted, soft, and healthy for nearly two months. The application process was smooth and simple, thanks to high-quality tools and clear instructions. It’s perfect for anyone looking for a full, natural lift with impressive durability.
2. Fleeky Lashlift Kit
The Fleeky Lashlift Kit is an excellent vegan and cruelty-free option, ideal if you’re looking for an eco-conscious choice. This kit comes in a beautifully designed, eco-friendly box and offers everything you need for a quick, effective lash lift. Its vegan, cruelty-free formula feels gentle on both lashes and the environment. Although it doesn’t contain as many nourishing ingredients as the Nanolash kit, it’s a great option if you want simplicity and environmentally-friendly packaging.
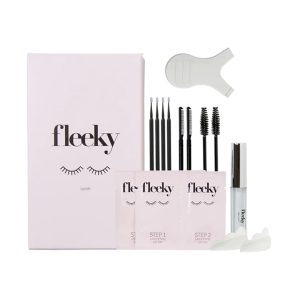
Fleeky’s kit delivers satisfying results with a simple application process, even for beginners. You can expect your natural lashes to appear visibly longer and fuller, with the lift lasting around 6 weeks. Although this isn’t as long-lasting as some other kits, it’s still impressive. My lashes appeared visibly longer and fuller, though I’d recommend following up with a conditioner if your lashes tend to dry out.
For me, Fleeky was quick to apply and provided a natural, soft effect. The vegan formula felt gentle, and I appreciated knowing that it was cruelty-free. While the effect wasn’t as long-lasting, it’s a solid choice for those who value eco-friendly beauty products.
3. Thuya Lash Lift Kit
Thuya, a popular Spanish brand specializing in lash and brow styling, has created a highly-rated lash lift and lamination kit that I was eager to try. The results didn’t disappoint! This kit provided a lovely, long-lasting lift that kept my lashes curled for around 7 weeks – almost as long as with the Nanolash kit. The Thuya kit is versatile, offering both lash lift and lamination, so it’s a great all-in-one solution for enhancing lashes.
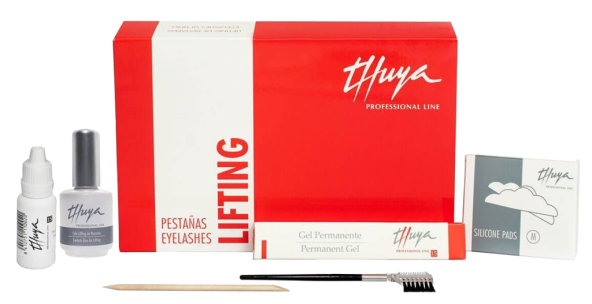
One downside is that, while it includes glue, gel, neutralizer, and rods, it doesn’t come with a lash conditioner. You can purchase an argan cream separately, which helps nourish the lashes post-lift, but it’s not included in the kit itself. For me, that was a bit of a drawback, as I like kits that provide a complete lash care solution.
Thuya’s kit gave my lashes a beautiful, soft curl that held up well over time. I loved the nourishing effect it had, though the lack of conditioner was a downside. For a simple, effective lift with long-lasting results, it’s a great option, especially if you’re okay with adding a bit of extra conditioning post-lift.
4. Zola Lash and Brow Reconstruction System
The Zola Lash and Brow Reconstruction System stands out as a multi-use kit for both lash and brow lamination. If you love the laminated brow trend, this kit lets you achieve that sleek, defined look while also giving your lashes a subtle, natural lift. It’s packed with nourishing ingredients to support healthy lashes and brows, though it performs better for brows than for lashes.
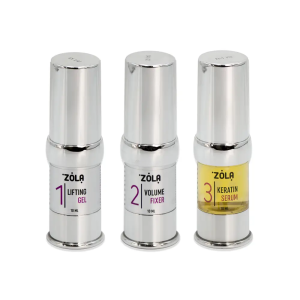
Zola’s kit offers a gentle lift, ideal if you prefer a softer, understated curl rather than a dramatic look. The lash lift results last around 4 weeks, which isn’t as long as others, but the versatility of having both lash and brow lamination options in one kit makes it a valuable addition to your beauty routine.
The Zola kit is excellent for anyone wanting a combined lash and brow kit. While it didn’t offer the most dramatic curl for lashes, it was perfect for a soft, natural look. I’d recommend this for those who love the laminated brow look and want an easy, gentle option for lashes as well.
5. Elleebana Lash Lift
Elleebana is a renowned name in the world of lashes, and their Lash Lift Kit brings salon-level drama to your at-home routine. This kit is excellent for those wanting a bold, noticeable curl that holds up for a long time. Though it’s a professional-grade kit, it requires precise application to prevent over-processing, making it slightly challenging for beginners.
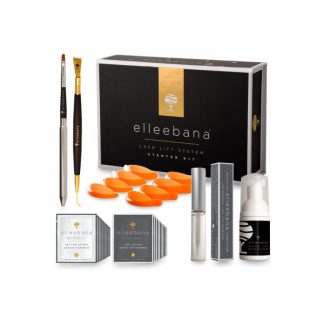
The strong lift effect lasts for 6–8 weeks, and it’s ideal if you want a very defined, high-impact look. However, the formula can feel a bit harsh, so I recommend following up with a lash serum or conditioner. Elleebana is a fantastic choice if you have some experience with DIY lash lift and lamination and want a more dramatic result.
Elleebana delivered the most intense lift, giving me a very defined curl that really made my eyes pop. The application process was a bit tricky, but the results were stunning. I’d suggest this kit if you’re after a bold, professional look and don’t mind a more time-consuming application.
Conclusion: DIY Lash Lift and Lamination Step-by Step
Achieving beautiful, lifted lashes at home is simple with the right kit and a bit of preparation.
Here’s a step-by-step guide:
- Gather Your Supplies: Ensure your kit has everything you need, including perming solution, neutralizer, lash glue, silicone rods, and any nourishing serums if included. Prepare some cotton pads, Q-tips, and a lash comb on hand as well.
- Clean and Prep Lashes: Start by cleaning your lashes thoroughly to remove any oils, makeup, or dirt. Use a gentle lash and brow shampoo or a makeup remover to ensure the lashes are completely clean and dry for the best results.
- Apply Silicone Rods: Place the lash rods on your eyelids, as close to the lash line as possible, and secure them using lash glue. Choose the right size rod based on the length and desired curl of your lashes.
- Adhere Lashes to the Rods: Using the lash glue, carefully attach each lash to the rod. Make sure each lash is separated and straight to ensure an even curl. A lash comb or Y-shaped brush included in most kits can help with this task.
- Apply the Perming Formula: Using a small applicator or Q-tip, apply the perming solution to the lashes, avoiding the lash roots and tips. Let it sit for the recommended time as stated in your kit instructions (usually 8–12 minutes). Be careful not to use too much product.
- Remove Perming Formula and Apply Neutralizer: Gently remove the perming formula using a clean cotton pad or a Q-tip. Next, apply the neutralizer in the same way, allowing it to set for the recommended time (usually 5–10 minutes).
- Apply the Nourishing Conditioner: If your kit includes a nourishing conditioner, apply it to the lashes to help keep them soft and hydrated. This step helps counteract any dryness from the lifting process.
- Remove the Rods and Clean the Lashes: Carefully peel off the rods from your eyelids, making sure to avoid any tugging. Gently clean any residues from your lashes, and comb through them to keep them separated.
- Aftercare Tips: Avoid getting your lashes wet or applying any products (including mascara) for 24 hours to let the lift effect set properly. Afterward, maintain your lashes by applying a nourishing lash serum or oil to keep them healthy and conditioned.
Following these steps will help you achieve a salon-quality lash lift and lamination at home, giving you beautiful, curled lashes that can last for several weeks!
