Nanolash Lash Lift Kit: My DIY Eyelash Transformation Experience
For a long time, I had been searching for a way to enhance the look and health of my eyelashes. My lashes were naturally short and thin, and their condition wasn’t the best. Using an eyelash curler every day and relying on false lashes didn’t seem to improve things much, so I began looking for a more lasting solution. That’s when I decided to try the Nanolash Lash Lift Kit, and today, I’m excited to share my experience with you!
Why Lash Lamination Became My Go-To Treatment
If you’re familiar with my eyelash struggles, you’ll know that I’ve always been cautious about trying new beauty treatments. After all, one wrong move could make my lashes even worse, and I didn’t want that! I had heard a lot about lash lamination, a treatment that promises not only lengthening and curling but also nourishing and strengthening the lashes. It seemed like the perfect solution for my needs, so I decided to give it a try.
Among the many options out there, I kept coming across positive reviews of Nanolash. The brand’s Lash Lift Kit had received a lot of attention for its effectiveness, and after reading several testimonials from other users, I felt confident that it was worth a shot. So, I quickly placed an order, and within no time, the kit arrived at my doorstep. Let’s dive into what happened next!
Unboxing the Nanolash Lash Lift Kit
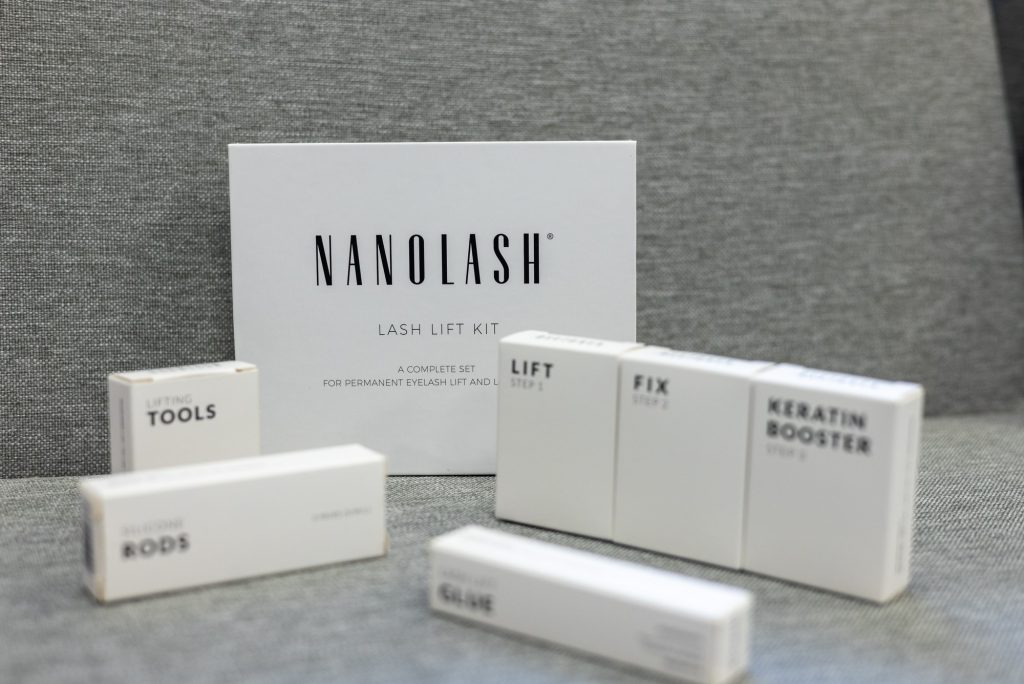
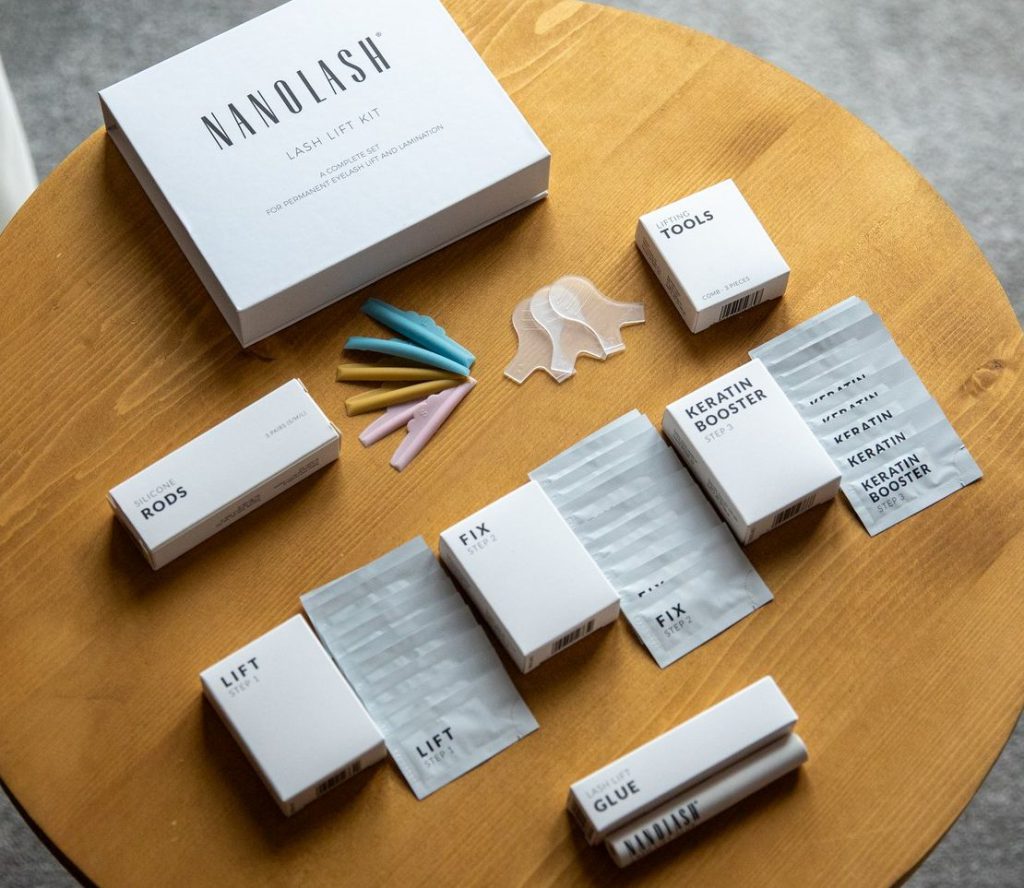
When I first looked at the Nanolash Lash Lift Kit, I was impressed by how complete the package was. Everything I needed to achieve professional-quality lash lamination at home was included. Inside the box, I found:
- Three essential products for the DIY lash lift and lamination process: Lift (Step 1), Fix (Step 2), and Keratin Booster (Step 3)
- Three pairs of silicone rods in different sizes for customizing the effect to my lash length and desired curl
- 5ml Lash Lift Glue to keep everything in place
- 3 lash combs
One thing that really stood out to me was that the ingredients used in the kit were safe and natural. The product labels listed nourishing oils such as coconut and avocado oil, which made me feel much more at ease about applying these products to my delicate lashes.
The kit comes with a total of 30 sachets, each containing 0.5ml of product. This means that, with proper care, you can perform the lash lift and lamination treatment up to 10 times – an incredibly cost-effective option for anyone looking to maintain their lashes long-term.
How Easy Is It to Laminate Your Lashes at Home?
As someone who had never tried lash lamination before, I was a bit apprehensive about doing it myself. However, I found the instructions that came with the Nanolash Lash Lift Kit to be incredibly straightforward and easy to follow.
The process was surprisingly simple:
- Prep the lashes: I started by cleaning my lashes thoroughly to remove any makeup or residue, ensuring that they were free of oils and dirt.
- Apply the silicone rods: Next, I chose the silicone rod that best suited the shape of my lashes and attached it as close to the lash line as possible. This was crucial for getting a natural yet defined curl.
- Apply the Lift product: I then applied the first product, Lift (Step 1), and left it on for 10 minutes before gently washing it off with an applicator.
- Apply the Fix product: Afterward, I applied the Fix (Step 2), followed by the Keratin Booster (Step 3) to nourish and strengthen my lashes. Each product was applied in the order specified in the instructions, and I made sure to leave the recommended amount of time for each step.
- Remove the rods: Once the products had been on for the right amount of time, I carefully removed the silicone rods.
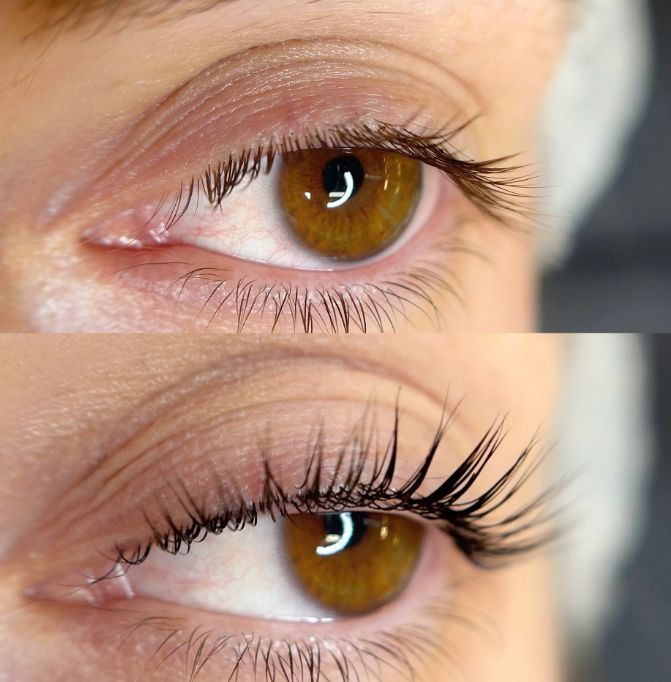
The results were incredible. My lashes looked beautifully curled, longer, and visibly fuller. Not only that, but the texture of my lashes was so much softer and healthier. The treatment also made them look shinier, which was something I had always wanted. Despite the fact that my lashes were in less-than-ideal condition when I started, the treatment worked wonders and left them in much better shape.
The Results: How Long Did the Lash Lift Last?
After completing the treatment, I was thrilled with the results. Not only did my lashes appear dramatically longer and more voluminous, but they also maintained their curl for a full 8 weeks. This was a major win for me, as I had always struggled to keep my lashes curled, even with regular use of a lash curler. The Nanolash Lash Lift Kit was truly a game-changer.
Final Thoughts: Can I Recommend Nanolash Lash Lift Kit?
If you’re on the fence about trying the Nanolash Lash Lift Kit, let me tell you: it’s absolutely worth it. My lashes have never looked better, and the treatment was much easier than I had anticipated. From the natural, safe ingredients to the simple and effective process, Nanolash delivers on its promises. My lashes are not only more voluminous, but they are also softer, shinier, and healthier than before. And with up to 10 uses per kit, it’s also a fantastic value for anyone looking for a long-term solution to lash issues.
If you’ve been struggling with weak, short, or lackluster lashes, I highly recommend giving Nanolash Lash Lift Kit a try. It helped me achieve results that I didn’t think were possible, and I’m confident it can do the same for you. Say goodbye to lash extensions and give your lashes the care they deserve with Nanolash!


